
Second-generation office space looks like a shortcut. The walls are up, the ceilings are in, and the last tenant left behind furniture. It feels cheaper and faster than building out a raw shell.
Sometimes it is. But the costs that blow a budget are rarely the ones you see on a tour. They hide above the ceiling, behind the walls, and in code requirements that only surface once you start construction.
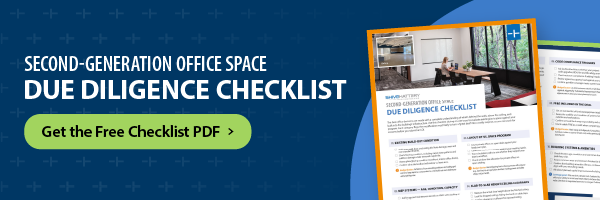
This checklist is built to be used on-site, during tours. For each item, we flag the modification most likely to turn a “great deal” into a costly surprise, so you can push for answers before you submit an LOI.
The 10-Point Tour Checklist
1. Existing Build-Out Condition
- Walk every wall, door and ceiling tile. Note damage, wear and non-standard finishes.
- Check flooring for carpet wear patterns and subfloor damage under removed carpet tile.
- Assess glass and glazing, including storefront and interior office fronts.
- Confirm what the landlord will restore versus leave “as-is.”
Budget buster: Full demo of non-reusable partitions and ceiling grid. This often runs $8 to $15+/SF, comparable to a full build-out before you add anything new.
2. Layout Fit vs. Your Space Program
- Count private offices and open desks against your headcount plan.
- Count and size conference rooms against your meeting needs.
- Trace circulation paths. Do they support how your team works?
- Check who gets the windows: private offices or open seating.
Budget buster: Converting a heavy private-office layout (like a former law firm) to open plan. It means moving power and data drops, not just walls.
3. MEP Systems: Age, Condition and Capacity
- Ask for age and maintenance records on HVAC units, rooftop or in-ceiling.
- Confirm electrical panel capacity against your load needs.
- Check plumbing condition, especially if you plan to add kitchens or pantries.
- Ask for remaining useful life on major equipment, in years, not just “it works.”
Budget buster: HVAC replacement or an electrical service upgrade. Expect $50K to $200K+ per unit or panel, and it is often not covered by standard TI allowances.
4. Slab-to-Slab Height and Ceiling Clearance
- Measure the actual clear height above the finished ceiling.
- Look for dropped ceilings hiding ductwork or cable trays.
- Confirm there is enough clearance for an exposed-ceiling look, if you want one.
- Check clearance for any new HVAC distribution you plan to add.
Budget buster: Rerouting ductwork or sprinkler mains to raise the ceiling. It can require engineering redesign and is sometimes structurally impossible at any price.
5. Cabling, IT and Telecom Infrastructure
- Ask for cabling documentation: type (Cat5e, Cat6, fiber) and age.
- Inspect telecom and IDF closets for condition and capacity.
- Confirm whether existing cabling is usable or must be stripped. Code often requires removing abandoned cable.
- Check the point of entry for carrier diversity and redundancy.
Budget buster: Required abandoned-cable removal plus full re-cabling. It is easy to underestimate at $3 to $6+/SF.
6. Code Compliance Triggers
- Ask the landlord or architect whether your scope triggers code upgrades (ADA, fire and life safety, energy code).
- Check restroom compliance if you are adding headcount.
- Check egress and occupancy load against your planned density.
- Confirm sprinkler coverage meets current code for your use.
Budget buster: An ADA restroom retrofit or full-floor sprinkler upgrade triggered by “substantial improvement” thresholds. These can show up even in areas you never planned to touch.
7. Environmental and Hazardous Materials
- Ask for any existing Phase I ESA or asbestos (ACM) survey.
- Flag pre-1980s buildings for likely asbestos in flooring adhesive, pipe insulation and ceiling tile.
- Look for signs of water damage or mold behind walls and in ceilings.
- Confirm who pays for abatement if something is found: landlord or tenant.
Budget buster: Asbestos abatement during demo. It can add $5 to $20+/SF and cause major schedule delays if discovered mid-construction.
8. Furniture and Equipment (FF&E) Included in the Deal
- Get an itemized list of furniture and equipment that stays versus goes.
- Assess the condition of systems furniture like workstations and cubicles.
- Confirm who is responsible for removal and haul-away if it is not usable.
- Count usable FF&E as a credit when comparing your options.
Budget buster: Hauling away unusable systems furniture. At $1 to $3/SF, it is a common tenant surprise if it is not negotiated into the LOI.
9. Demo Cost vs. TI Allowance
- Get a real contractor estimate for demo before assuming you will save money over first-gen space.
- Compare the landlord’s TI allowance against your total estimated cost (demo plus new build).
- Confirm what counts toward TI, such as soft costs and permits.
- Model a worst case where demo costs exceed the TI allowance.
Budget buster: Underestimating demo. Second-gen “savings” disappear fast if demo and code costs exceed what a shell build-out would have cost.
10. Building Systems and Amenities
- Check elevator age, condition and wait times during a peak-hour visit.
- Assess common areas and restrooms for a dated feel.
- Confirm building amenities (fitness, conferencing, lobby) support your recruiting goals.
- Ask about planned capital improvements and building upgrades.
Leverage point: This one is not a tenant cost. Outdated building systems affect your ability to recruit and retain talent, and your future sublease value. Use them to negotiate lower rent or a larger TI allowance.
Watch for the Invisible Three
Items 3, 6 and 7 are the hardest to spot on a walkthrough
and the most likely to blow a budget.
MEP systems, code triggers and hazardous materials rarely show up on a tour. Push hard for documentation on all three before you submit an LOI.
Bring Us on the Tour
Shive-Hattery’s workplace strategy and design team can tour spaces with you, flag hidden costs early and run a test fit before you commit. Bring this checklist to every tour, and let’s talk through your next move.
Cost ranges are general estimates and vary by market, building and scope.
Related Case Studies
Explore how Shive-Hattery has helped organizations transform their workplaces through thoughtful design, improved functionality, and spaces that support the people who use them.
- Shive-Hattery’s West Des Moines Office Renovation — Reimagining an existing building to support growth and collaboration.
- Confidential Reinsurance Company – Chicago — Creating a cohesive and functional workplace through renovation.
- RSM – Philadelphia — Right-sizing a downtown office for hybrid work with flexible, collaborative spaces.
- Shive-Hattery – Cleveland — Opening a new design office to better serve clients across Ohio.
- Shive-Hattery – Tacoma Office — Moving our Tacoma team into a new office as Helix Design Group became Shive-Hattery.
About the Contributor

Business Development
Commercial Business Unit Support
“I listen with an empathetic ear and I learn about my clients’ real estate needs and goals. Being inquisitive has helped me develop a firm understanding of what needs to occur from acquiring/leasing real estate to successfully delivering a project. My clients appreciate my responsiveness and exceptional follow-through. This involves helping them effectively manage the process with a positive and persistent attitude. Part of my role includes opening doors, meeting and connecting new people, to develop lasting relationships. These are connections with a purpose. That means I take the time to and enjoy learning about people and, over time, we evolve from acquaintances, into respected peers, and friends/advocates within each other’s network.”
